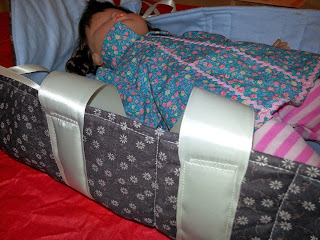
Project 7: Yesterday I was thinking there was another project but I couldn't think of what it was. This morning I remembered that I covered a large diaper box with poster board so I could use it as a "drawer" to keep sleep n play one piece outfits in since the dresser has such tiny drawers.
Wednesday, April 2, 2014
Project 7: Covered Diaper Box
Tuesday, April 1, 2014
Lily's Baby Doll Bed
My best friend's little girl had her fourth birthday a couple of weeks ago. I wanted to create something for the little girl that would last long after her Little House on the Prairie birthday party was over. I saw a great tutorial over at Almost Super Mom for a doll bed that used ribbons to tie up the corners to create the bed portion. I used a brown calico fabric for the outside and baby blue flannel for the inside. Instead of batting, I used fleece left over from another project. It turned out so cute and Lily loved it!
Wednesday, April 3, 2013
Princess Turret Reveal
I have been working on a princess turret for my niece Leyna for about a month now. She was born April 2, 2013 so I really needed to finish up this project so it can be used to decorate her room. I can't wait to deliver it to her on Sunday. I am going to share some photos of how I created it later.
Sunday, March 3, 2013
Pay It Forward Handmade Swap February 2013
Here are the "rules" (as taken from Aquamareen's blog).
1. I will create a crafty gift for each of the first three people who comment to this post. This is a surprise, and will arrive to you anytime within the next 365 days.
2. In signing up for Pay it Forward, you are committing yourself to the project...someone pays it forward to you, so you pay it forward to others! Just post this, or something similar so others can get involved. Basically you will create your own post where you create gifts for 3 people as well.
3. You need to have an active blog of your own...{or some way to post up your PIF info like a flickr, pinterest, or Facebook account. Basically you'll need a place to announce your own PIF and to post some pics of the process.}
4. After commenting on this post, post something similar on your blog...so you can spread the pay it forward love. I will email you asking for your mailing address {and the online address where you are posting your PIF info} so I can get your crafty treat in the mail. Please make sure your email address is visible on your profile or leave it in the comment.
Saturday, February 9, 2013
Niece Leyna's Nursery Curtains
I just love Michael Miller's Pink Giraffe Love fabric. I lined the curtains with an orange batik fabric to make them thicker. The top of the curtain was a 6 inch wide strip that I finished at each end to put on a curtain rod. Aren't they beautiful?
Saturday, January 12, 2013
Sweet Pouch Swap zippered pouch
I am participating in a great little zippered pouch swap from Sew Delicious http://www.sewdelicious.com.au/2013/01/sweet-pouch-swap-sign-up.html
I am going to fill this with a selection of sweet treats and mailing it off to a special lady in the next week.
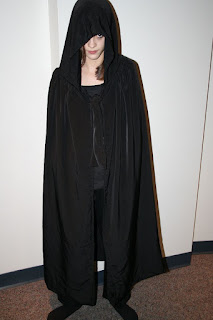
Cloak for drama group
I was able to make a great black cloak from 2 rectangles where one was gathered to match up with the hood. I used the tutorial found at http://diyfashion.about.com/od/costumes/ss/Make_a_Cape.htm
Subscribe to:
Comments (Atom)


